Seed Boot Bushings (patented)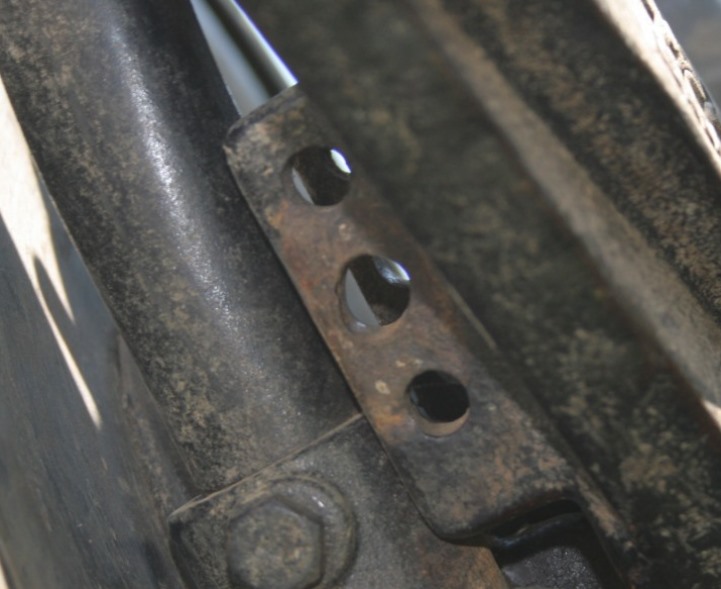

The ProblemAs the acres on a John Deere single disc drill or air-seeder accumulate over 200-300 acres per row (+/- 10,000 – 15,000 acres on a 30' air seeder for example), the holes which mount the seed boots to the arm become worn and/or egg shaped as illustrated left. This wear (together with wear in the seed boot holes, plus the bolt which mounts the boot to the arm) can all add up to cause significant forward/backward seed boot movement which translates into upward/downward movement. This excessive vertical movement has been found to significantly compromise seed placement, especially when seeding shallow and/or when working at higher speeds in no-till conditions. How do you know when the bushings should be added? Based upon our field observations, when the seed boot can be moved up and down more than ½" (measured from the lowest rear corner of the seed boot), seed placement begins to significantly deteriorate. Many drills and air-seeders have 1" or more vertical travel, therefore this is one of the major reasons for lots of seeds on top of the ground and poor stands, especially when seeding at higher speeds in no-till conditions. Watch the you-tube movie which illustrates the play within the seed boot mounting points on a John Deere air-seeder.
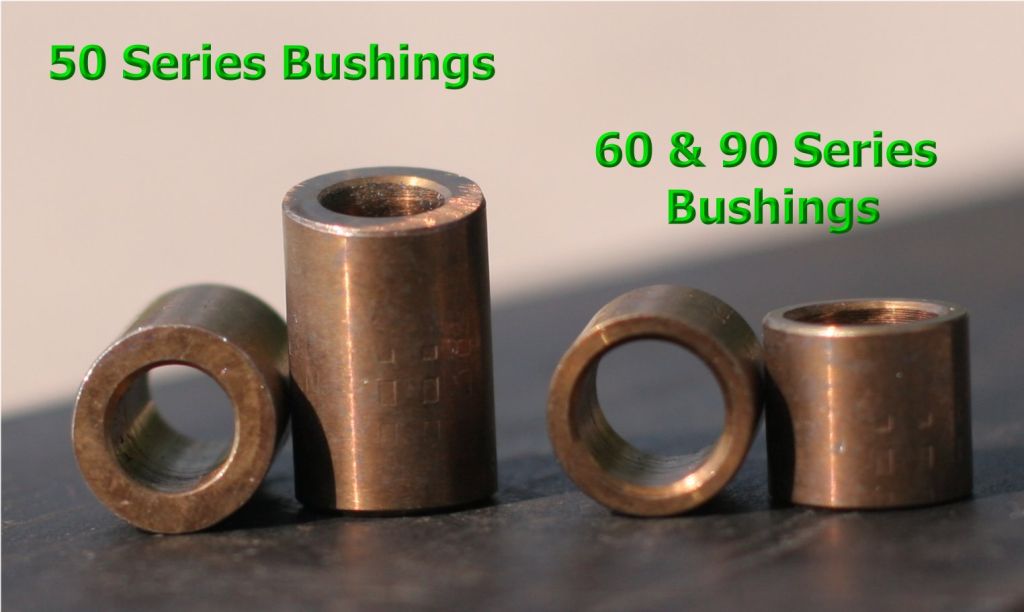
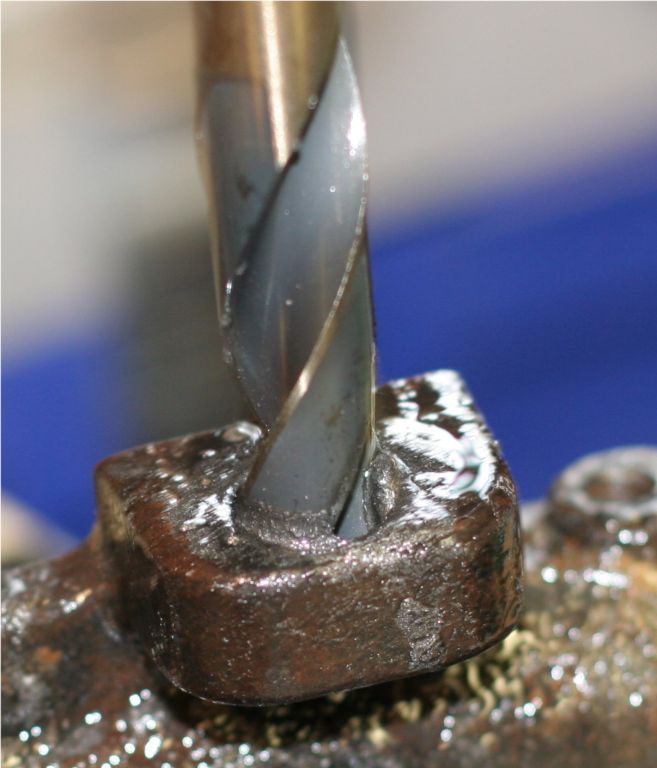
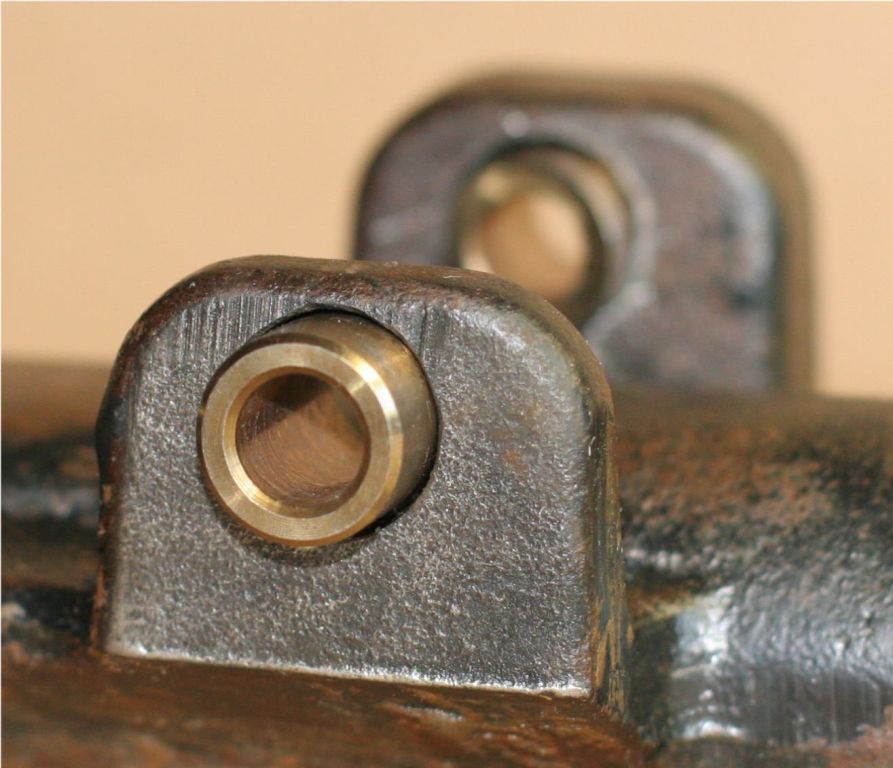
The SolutionWe are proud to release a great new method of almost eliminating the undesirable play, even within very worn seed boot mounting points on 50, 60 and 90 series John Deere drills and air-seeders. Our solution to almost eliminate this undesirable play involves drilling a larger hole within both sides of each seed boot and inserting two long-life hardened steel bushings. With a sharp drill bit (used within a good drill press) each hole can be drilled out in a couple of minutes (Some growers drill new holes when they replace the boots, this saves time removing the boots just to drill the holes). Once the holes are drilled out, the bushings are then inserted. Finally the original bolt (with washers) is then pushed back through the bushings and the arm. Finally the nut is added and torqued. The secret which makes this kit so successful is that once the nut is tightened, it presses both bushings against the lugs on the arm. This allows both bushings to now become the pivot point for the seed boot to rotate around. The combination of increasing the distance between the two pivot points and the limited tolerance between the hole and the bushings allows the seed boot to pivot easily and to help it tight against the disc. The kit almost eliminates any forward/backward or vertical movement – even on even the most worn arms and boots within older John Deere drills and air-seeders. Youtube Video Showing How the Needham Ag Seed Boot Bushings Work
We have made a short (6 minute) instructional video, illustrating the process of clamping and drilling the seed boots in preparation for installing the seed boot bushings. To view this movie, please click the youtube movie below (you will need high-speed internet access).
Watch the you-tube movie below to see how our bushing kit eliminates the up/down movement in the seed boot.(Courtesy of Don, a Needham Ag Customer)
When to replace the seed boots on John Deere drills and air-seeders.
If you have slower Internet access, be sure to use the "CHANGE QUALITY" function in the bottom right corner of the video screen (It's located next to the CC symbol). It loads MUCH faster when the 240 quality option is selected.
For more information, together with pricing – please click the link below.
|
 Product Guide